Before reading this guide, you should review the Focusing Screens component page.
Which type should I buy?
The standard focusing screen for Bronica ETR cameras was the Split-image Microprism, up until the release of the ETRSi model, where it was changed to the Matte screen. If you have (or are purchasing) a camera that includes a Split-image Microprism, Split-image, or Microprism Spot focusing screen of acceptable quality, you may have no need to purchase any additional screens.
Personally, I only use the Split-image Microprism screen. As the ETR system does not include any autofocus capabilities, and my eyes are getting a bit older, any of the matte screens are going to make it harder to produce sharply focused images – probably not worth an additional purchase.
The Grid Lines screens may be useful if you are engaged in architectural or other technical fields of photography – however, I find it hard to ignore the words of Henri Cartier-Bresson whenever I look at this screen!
The 135 screen types will only be useful if you are shooting with 35mm film in a 135-N or 135-W film back. You’ll probably want the Split-image Microprism 135 screen in this case to aid with focusing.
Finally, I would personally avoid any of the ETRSi generation split-image screens with the horizontal split, which I find slightly more difficult to use, simply due to the more common alignment of horizontal lines in the focal target with the horizontal split.
Purchasing notes
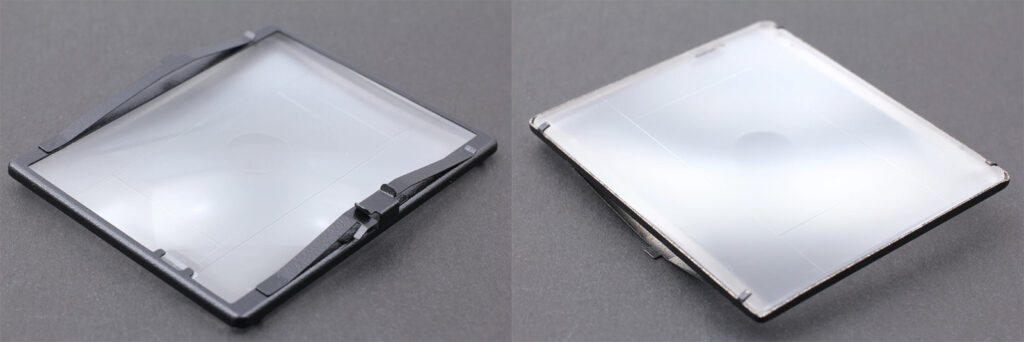
- Screens may be sold with or without the black metal frame – you should buy a screen that includes the frame. If sold without, you will need to transfer the metal frame from an existing screen, by bending the four small metal tabs at the back of the screen. I would only remove the frame from a screen that is damaged beyond usability, as there is a chance the tabs will break if bent more than a few times, and there is also a chance of damaging the screen while trying to remove the frame.
- ETRSi generation screens have a slightly different frame that includes two additional tabs on the lower left side, located either side of a clear section of glass for the battery check indicator LED. It is difficult to distinguish between ETR and ETRS generation screens, unless boxed (noting the box and component may not be an original pair).
- There is no real difference in functionality between different generations of this component – it’s more down to your preference of screen type (split-image, microprism, etc.). Having said that, the older the screen, the more likely it will be to have scuffs or scratches.
What to look for
Make sure you verify the quality of the plastic screen surface before purchasing – light scuffs and marks are acceptable for a screen of this age, but heavy marking will impact upon your ability to compose a picture. Note that this can be very difficult to do with online purchases, particularly when screens are bundled with a camera body. Unless the vendor has posted very detailed pictures, you will need to accept the vendors condition report, and regardless should assume the screen has at least light scuffing.
Check that the black frame is intact and free of rust. The bottom side of the frame (nearest the film back) should have two small hooks at the centre that can be used to place and remove the screen. The top side of the frame should have a tensioning “spring” which will be attached to the frame on one side only. Also check that the four small black tabs on the underneath of the frame are in place – and haven’t been bent open and closed to attach the frame to a different screen.